
Virtual Microscope
A free online light microscope in 3D: focus it, light it, and explore 11 slides at true scale
Live optics
Lab notebook
Measurements, counts, micrographs and finished investigations are recorded here. Export a CSV, or turn the whole session into a PDF lab report.
| # | Slide | Mag. | Type | Value | Notes |
|---|
Concept library
Use this learning aid?
Click "New problem" to begin.
Click "Start quiz" for 5 questions: maths, identification and technique.
1 Overview
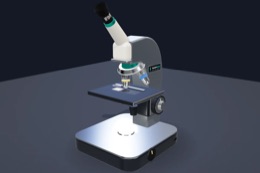
A complete bright-field compound light microscope that behaves like the real thing: coarse and fine focus, four parfocal objectives (4×, 10×, 40× and 100× oil immersion), 10× and 15× eyepieces, an LED lamp and a condenser iris diaphragm. Eleven slides are generated at true scale, with real depth, so focusing, depth of field, resolution and the iris all work the way they do in a school lab. It has three modes: Simulate (a free lab with learning aids and a concept library), Experiment (ten practicals you carry out by hand and write up as a PDF lab report) and Quiz (a practice quiz with worked solutions, then a 5-question quiz with a star rating).
The Units switch beside 2D | 3D shows every length in SI (micrometres and millimetres) or Imperial (mils and inches; 1 mil = 0.001 in). It changes the readouts, the live equations, the eyepiece scale bar and measurements, the notebook, the quiz questions and the PDF report, and the page remembers your choice for your next visit.
2 Getting started
- The microscope opens in 3D on a computer or tablet and in 2D on a phone. The View switch changes it any time and remembers your choice.
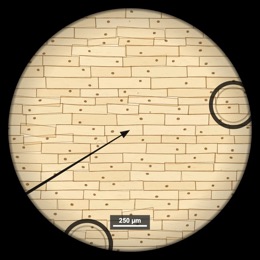
- An onion epidermis slide (stained with iodine) is on the stage with the 4× objective. Press ▲ Coarse (or drag the big focus knob, or scroll over the eyepiece with Shift) until the cells are sharp, then try 10× and 40× with the fine knob.
- Use the Move slide arrows and watch the image move the other way.
- Choose another slide from Slide, or press 🧪 Start an experiment.
3 Simulate: operating the microscope
- Focus: Coarse ▲▼ moves the stage 100 µm per click, Fine ▲▼ 0.5 µm. Hold a button to repeat. Over the eyepiece, hold Ctrl (⌘ on a Mac) and scroll, or pinch the trackpad, for fine focus; add Shift for coarse. Once you have clicked the eyepiece, plain scrolling focuses until the pointer leaves it. Otherwise scrolling always moves the page. On a phone, two fingers move the slide and a pinch changes the objective. Keys: PageUp/PageDown coarse, + / − fine.
- Auto-focus: the ⚡ button (or key F) runs the real focusing routine for you: 4× with the coarse knob, then 10× and 40× with the fine knob, ending exactly on the specimen. The first time, it asks whether you want to use it, because a real microscope must be focused by hand. Touching any focus control or objective stops it. It is switched off in Experiment mode, where you focus by hand.
- Depth gauge: shows the specimen's layers (purple lines), the focal plane (green line) and the depth of field (green band). Watch the band shrink as you go to high power.
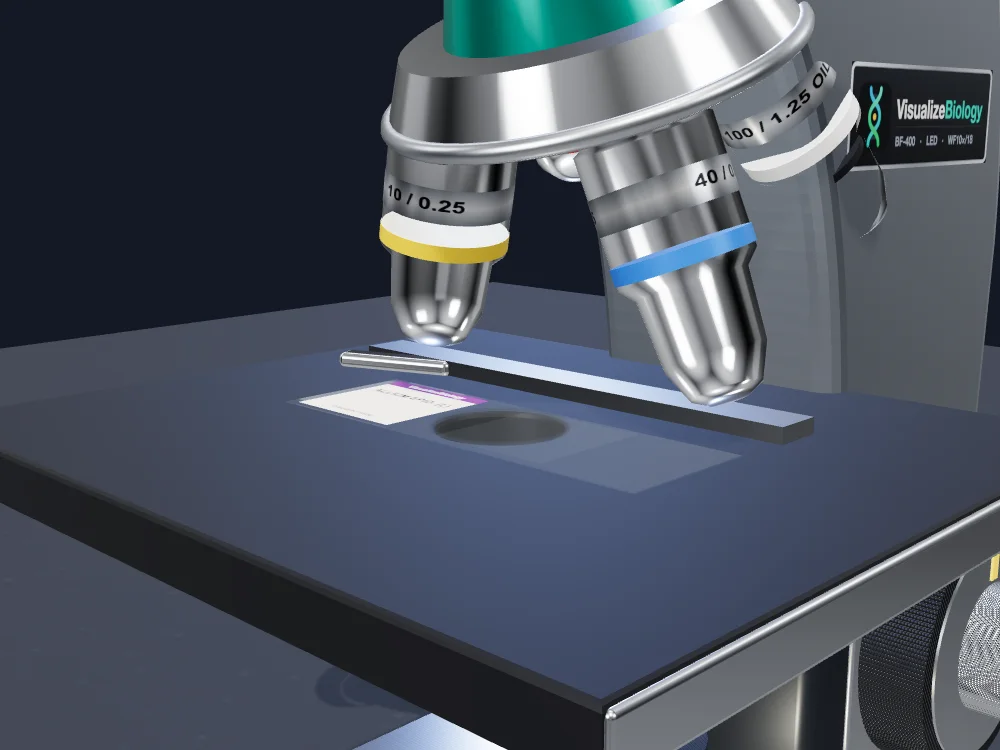
- Objectives: click the pills, the objectives on the microscope, or press 1–4. The 40× and 100× lenses are within half a millimetre of the slide: use coarse focus with them and you may crack the coverslip.
- Oil immersion: the 100× objective needs oil. Without it the image is foggy. Never swing the 40× through oil (you'll have to clean it).
- On the slide: living slides that take a reagent show an "On the slide" section in the Stage panel. Pond water: switch on Protoslo to slow the swimmers about 8×. Elodea: choose distilled water or salt solution to watch the cells plasmolyse and recover.
- Light and iris: raise the lamp as magnification rises. The iris slider sets the condenser NA; the violet marker shows the objective's NA. About 70–80% of it gives the best balance of contrast and resolution.
- Status: the Status button at the top-right of the eyepiece (or key S) opens the live readings: magnification, field of view, resolution, depth of field, objective NA and the lens-to-slide gap. A red dot on the button warns that the lens is about to touch the slide.
- On a phone: the lab is built for one hand. Switch Eyepiece / Microscope at the top of the view, or tap the small picture in the corner to swap. The controls live in the deck at the bottom of the screen: tap Focus, Lens, Light or Stage, and tap the open tab to tuck the deck away.
- Lab coach: messages in the eyepiece explain what just happened and why — including mistakes.
4 The 3D microscope
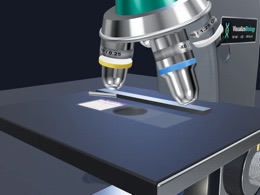
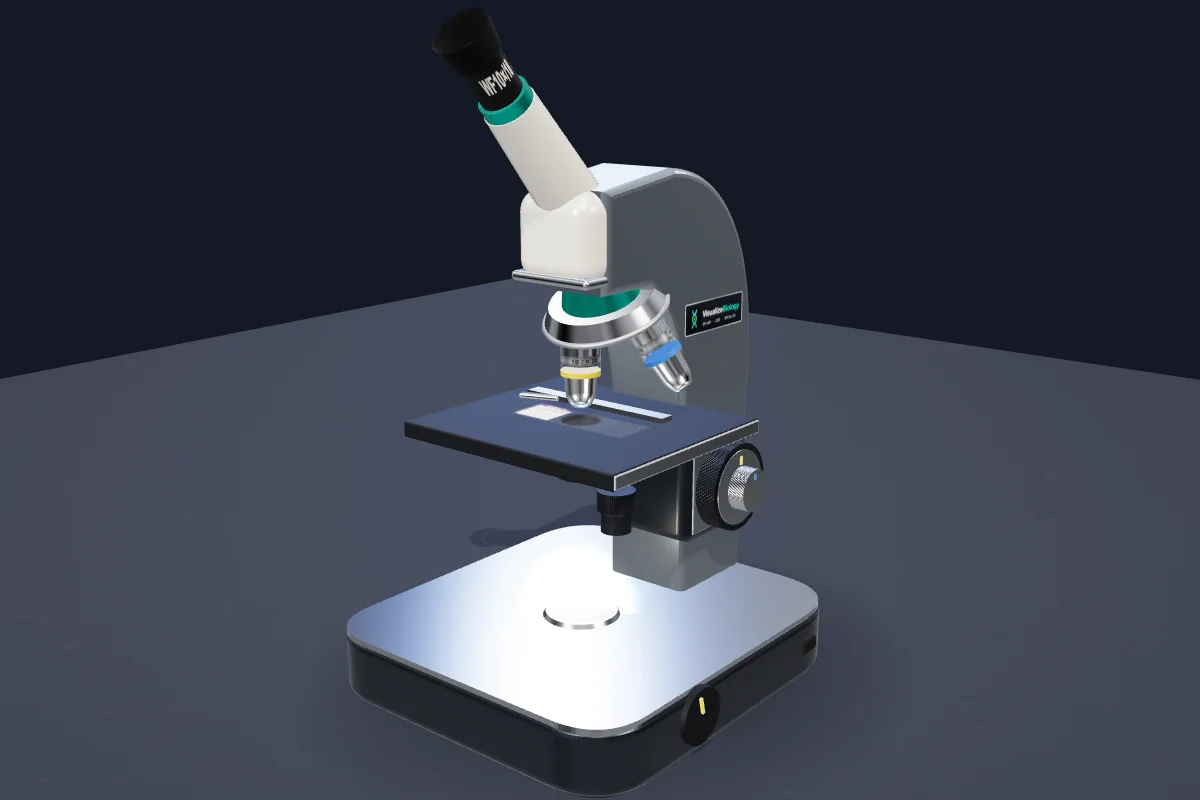
Drag the background to walk round the microscope, scroll or pinch to zoom, right-drag to pan. Every part is live: hover to name it, click an objective to turn the nosepiece, drag the coarse and fine knobs, the lamp dial and the stage knobs, click the eyepiece to look in. Label parts names everything and Light path shows the light travelling from the lamp to your eye.
5 Eyepiece tools
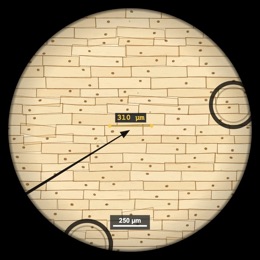
- Move: drag the image (the slide moves the opposite way).
- Identify: point at any structure for its name and job — including artefacts like air bubbles.
- Measure: drag across a structure for its true length; it is saved in the lab notebook with the resolution as its uncertainty.
- Count: on the root tip, blood, stomata and bacteria slides, choose a category and click cells. Each cell counts once, and the notebook tells you how many you classified correctly.
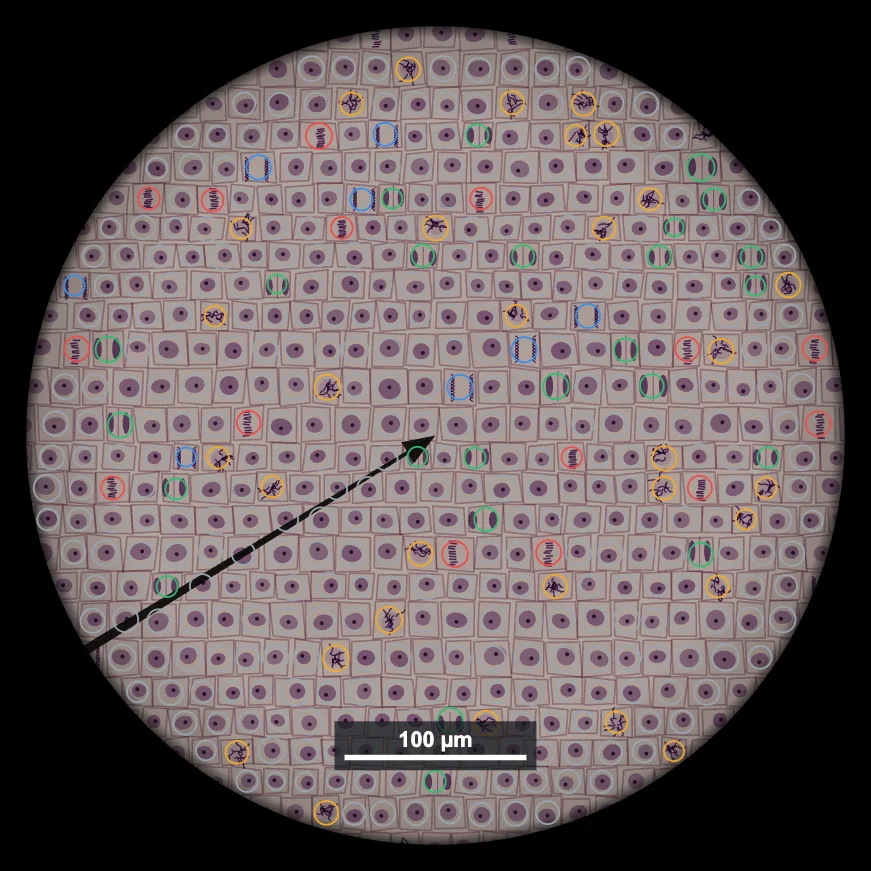
- Auto-count (key C): on the root tip, blood, stomata and bacteria slides it finds and rings every countable cell in the current field in its category colour, counts them one by one, and gives the totals and the result (mitotic index, white-cell percentages, stomatal density, Gram ratio). If you have counted by hand in the same field it compares the two. The first time, it asks whether you want to use it — in a real lab you count by hand. It is a Simulate-only aid: in Experiment mode you count by hand.
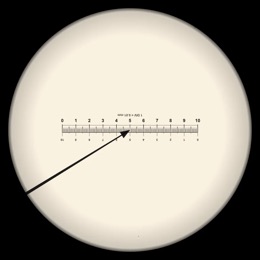
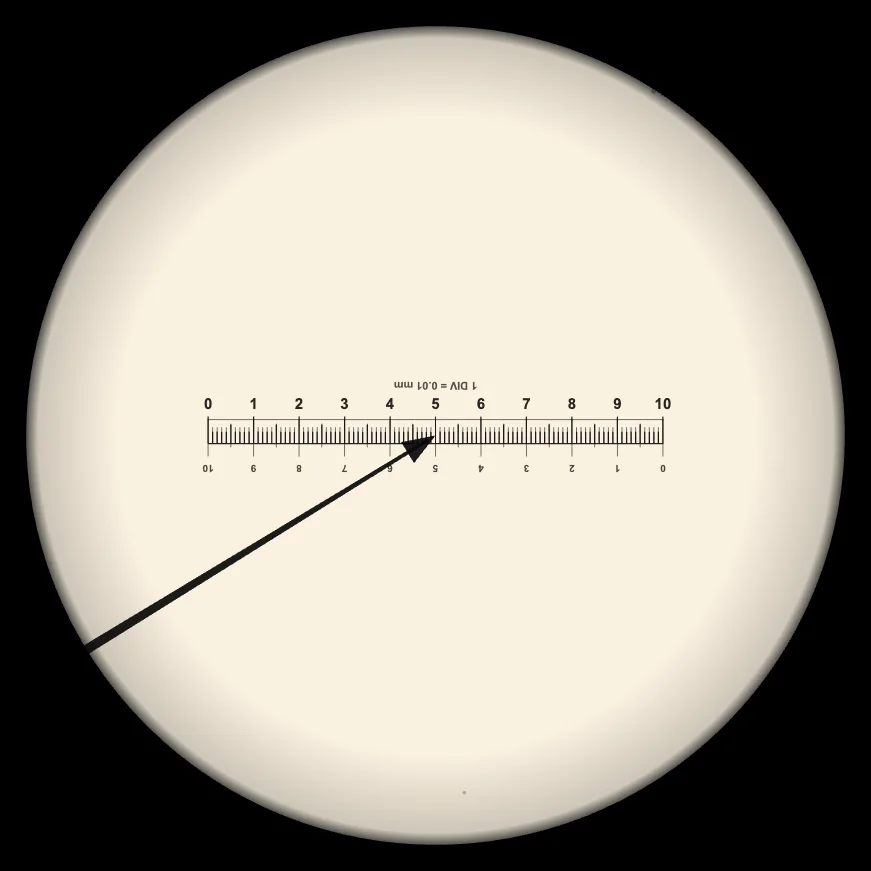
- Graticule: drag the eyepiece scale; Shift + drag rotates it. Use it with the stage micrometer to calibrate.
- Save: downloads a labelled micrograph (PNG) and keeps it for your lab report. Right-click the eyepiece for more options.
5b Lab report (PDF)
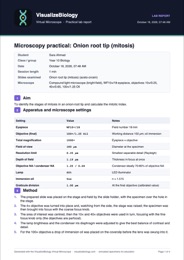
When you have finished, press 📄 Lab report (PDF) in the lab notebook. Add your name, class, aim and conclusion, choose which micrographs to include, and download a multi-page report. It contains a title block, the aim, apparatus and microscope settings, a method, captioned figures with scale bars, results tables and a bar chart of your counts, worked calculations, sources of error and your conclusion. Everything is generated in your browser — nothing is uploaded.
6 Experiment mode
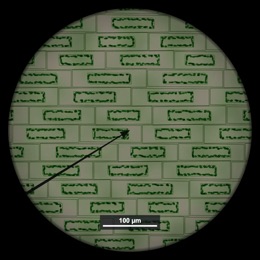
Experiment mode is a practical you carry out yourself, as in a real lab. Pick one of ten experiments: first focus and image inversion, which thread is on top, onion cells from 4× to 40×, calibrating the graticule, the iris trade-off, plasmolysis, the mitotic index, oil immersion, a white-cell differential count and stomatal density. Each shows its aim, what you need and a real-lab safety note. The method ticks off as you do each step on the microscope, a timer runs, and your measurements and counts go into the lab notebook. Answer the conclusion question from your own results, then press Create lab report for a PDF write-up pre-filled with the experiment's aim. Auto-focus and auto-count are switched off — if you press them you are offered a jump to Simulate, where you can use them to learn the technique.
6b Concept library
Below the lab in Simulate: cards on the parts of the microscope, the optics and maths (magnification, field of view, resolution, depth of field, graticule calibration), the slides and stains, and good technique and common errors. "Show me" highlights a part on the microscope; "Put it on the stage" loads a slide.
7 Quiz: practice, then the real quiz
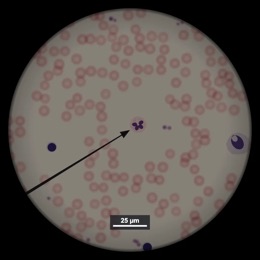
The Quiz tab opens on the practice quiz: unlimited questions, total magnification, field of view, cell size, I = A × M, graticule calibration, resolution, mitotic index and stomatal density, plus picture questions — name a highlighted part, identify a stage of mitosis, identify a white blood cell. Pick a topic, answer, press Check, and Show solution for a worked answer. When you are ready, choose Take the quiz: 5 mixed questions, feedback after each, and a 0–3 star rating.
8 Key formulas
Total magnification = eyepiece × objective. Field of view = field number ÷ objective magnification. Image size = actual size × magnification (I = A × M). Resolution d = 0.61λ ÷ NA. One graticule division = (stage divisions × 10 µm) ÷ eyepiece divisions. Mitotic index = dividing cells ÷ total cells. The Live optics panel shows these with your current settings.
9 Tips
- Always find the specimen at 4×, centre it, then step up.
- If you see nothing at high power, go back down — the field of view at 40× is only 0.45 mm wide.
- Unstained, living specimens (Elodea, pond water, stomata) need the iris partly closed.
- A perfectly round object with a thick black rim is an air bubble, not a cell.
- Sound effects can be switched off under Eyepiece & options.
Virtual microscope: a free online light microscope you can operate
This virtual microscope is a free, browser-based simulator of a standard school compound light microscope. You focus it with the coarse and fine knobs, switch between the 4×, 10×, 40× and 100× oil-immersion objectives, set the lamp and the iris diaphragm, and examine 11 slides built to true scale in micrometres. The optics follow real catalogue values, so the image blurs, dims and sharpens the way it does on a lab bench. That makes it useful for learning how to use a microscope and for practising microscopy calculations.
- Microscope
- Bright-field compound light microscope, LED lamp, Abbe condenser with iris diaphragm
- Objectives
- 4×/0.10, 10×/0.25, 40×/0.65 and 100×/1.25 oil (parfocal)
- Eyepieces
- 10× (field number 18 mm) and 15×
- Total magnification
- 40× to 1500×
- Best resolution
- 0.27 µm with the 100× oil objective
- Slides
- 11, including onion epidermis, cheek cells, living Elodea, a blood smear, an onion root tip, pond water, Gram-stained bacteria, leaf stomata and a stage micrometer
- Modes
- Simulate, Experiment (10 practicals) and Quiz
- Runs on
- Any modern browser, including Chromebooks, tablets and phones. 3D on larger screens, 2D on phones.
- Price
- Free, with no account or download
What you can do with it
- Operate the microscope in 3D or 2D. Turn the nosepiece, drag the focus knobs, move the slide with the stage controls, and switch on labels to learn every part.
- See what each control really does. The image is inverted, the field of view shrinks and darkens at high power, closing the iris raises contrast but costs resolution, and the 100× lens stays foggy until you add immersion oil.
- Measure structures in micrometres, calibrate an eyepiece graticule against a stage micrometer, and count cells by type.
- Carry out ten experiments by hand, each with a method checklist and a conclusion question.
- Save micrographs with a scale bar and download a PDF lab report with your settings, figures, results tables, calculations and sources of error.
Simulate mode has two learning aids, auto-focus and auto-count, which show the correct technique on screen. Experiment mode switches them off, so you work by hand as you would in a practical exam.
How to use a microscope, step by step
- Put the slide on the stage under the slide holder, with the specimen over the hole, and switch on the lamp.
- Turn the nosepiece until the 4× objective (red band) clicks into place.
- Watching from the side, raise the stage close to the objective with the coarse focus knob.
- Look through the eyepiece and lower the stage slowly with the coarse knob until the specimen is sharp.
- Move the slide so the part you want is in the centre of the field of view.
- Turn to the 10× objective, then the 40× objective, and use only the fine focus knob from now on.
- Adjust the lamp and the iris diaphragm until the image has good contrast without losing detail.
Never use the coarse knob with the 40× objective. Its front lens sits about 0.5 mm above the coverslip, and here, as in a real lab, the coverslip cracks if you drive the stage into it.
Parts of a microscope and their functions
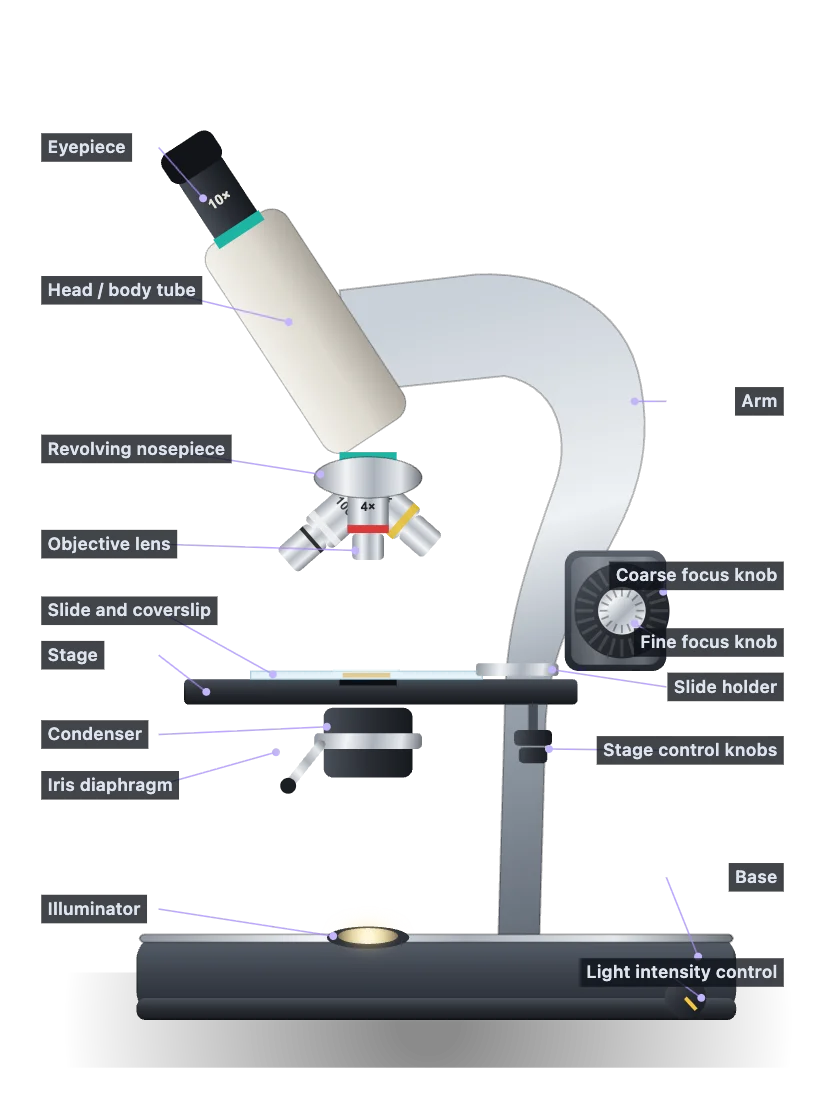
| Part | Function |
|---|---|
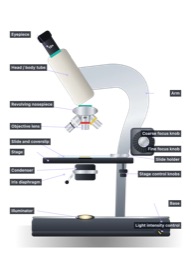
| Eyepiece (ocular lens) | The lens you look through. Magnifies the image again, usually 10×, and can hold a pointer or a measuring graticule. |
| Objective lenses | Form the first magnified image. Colour bands mark the power: red 4×, yellow 10×, blue 40×, white 100× oil. |
| Revolving nosepiece | Holds the objectives and turns to change magnification. |
| Stage and slide holder | Hold the slide over the hole that lets light through. |
| Stage controls | Move the slide left, right, forward and back. The image moves the opposite way. |
| Coarse focus knob | Moves the stage quickly. Use it only with the 4× and 10× objectives. |
| Fine focus knob | Makes small focusing movements. The only focus knob to use at 40× and 100×. |
| Condenser | Lens under the stage that focuses light onto the specimen. |
| Iris diaphragm | Controls the cone of light. Closing it adds contrast and depth of field but lowers resolution and brightness. |
| Illuminator (lamp) | Light source in the base. Turn it up as magnification rises. |
| Arm and base | Support the microscope. Carry it by the arm with a hand under the base. |
Microscope magnification, field of view and resolution
Total magnification is the eyepiece magnification multiplied by the objective magnification, so a 10× eyepiece with a 40× objective gives 400×. The field of view is the eyepiece field number divided by the objective magnification. Resolution is the smallest distance at which two points still look separate. It depends on the numerical aperture (NA), not on magnification: d = 0.61λ ÷ NA, with λ about 0.55 µm for green light.
| Objective | Total magnification (10× eyepiece) | Field of view | Resolution | Working distance | Depth of field |
|---|---|---|---|---|---|
| 4× / NA 0.10 | 40× | 4.5 mm | 3.4 µm | 17 mm | about 115 µm |
| 10× / NA 0.25 | 100× | 1.8 mm | 1.3 µm | 7 mm | about 18 µm |
| 40× / NA 0.65 | 400× | 0.45 mm (450 µm) | 0.52 µm | 0.53 mm | about 2 µm |
| 100× / NA 1.25 oil | 1000× | 0.18 mm (180 µm) | 0.27 µm | 0.15 mm | about 1 µm |
To work out the real size of something from a drawing or photo, use I = A × M (image size = actual size × magnification) and convert to the same units first, where 1 mm = 1000 µm. A cell drawn 45 mm long at ×1500 is 45 ÷ 1500 = 0.03 mm, or 30 µm, long. Bacteria about 1 µm long show up as dots at 400× and only reveal their shape at 1000× with oil, because resolution, not magnification, sets the limit.
What you can see: the slides
| Slide | Stain | Best magnification | What to look for |
|---|---|---|---|
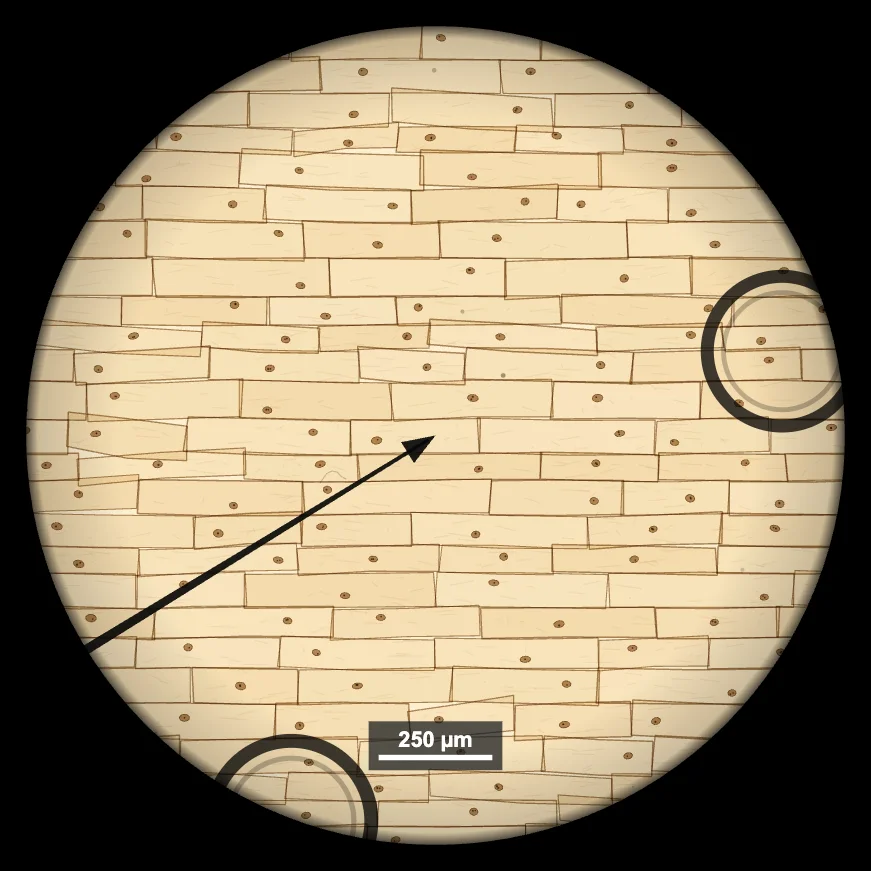
| Onion epidermis | Iodine | 100× to 400× | Brick-shaped cells 250 to 400 µm long, cell walls, nuclei with nucleoli, air bubbles |
| Human cheek cells | Methylene blue | 400× | Flat, irregular cells about 60 µm across with a dark blue nucleus and no cell wall |
| Elodea leaf (living) | None | 400× | Chloroplasts streaming round each cell, and plasmolysis in salt solution |
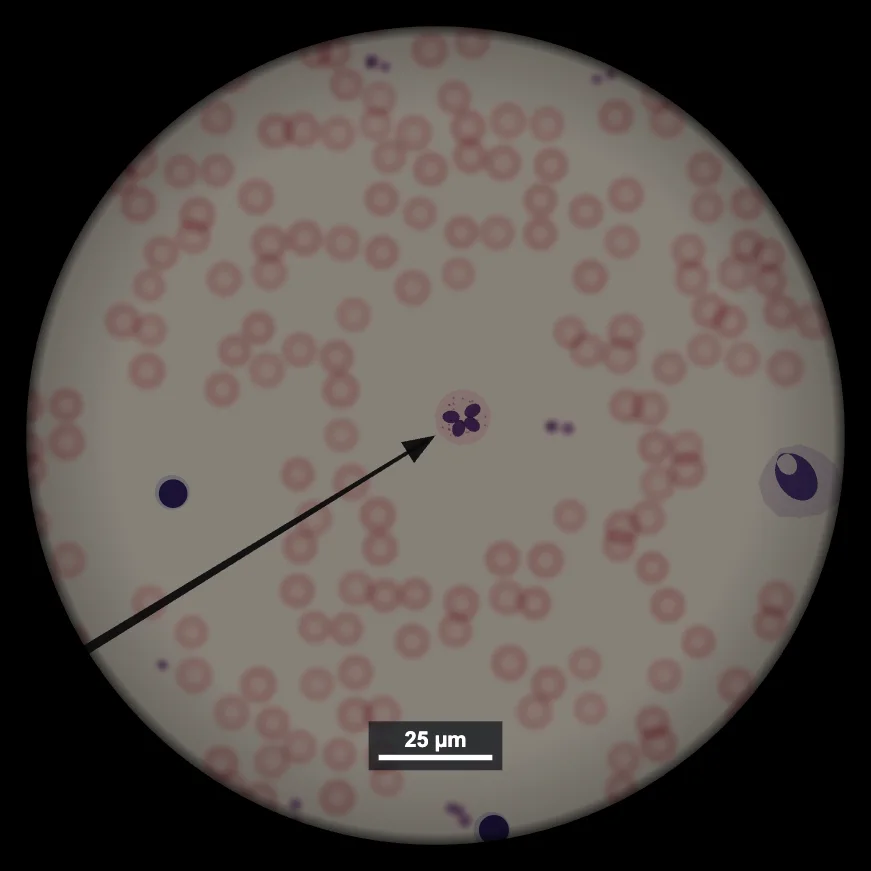
| Human blood smear | Wright's stain | 400× to 1000× | Red cells 7.5 µm across with no nucleus, five types of white cell, platelets |
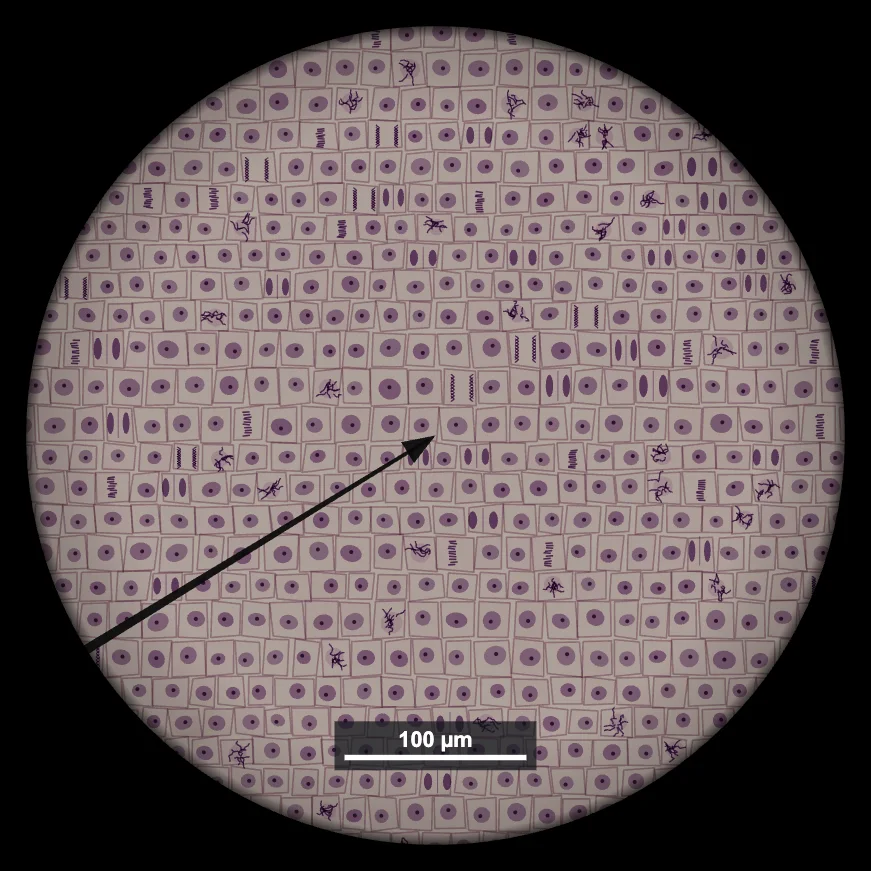
| Onion root tip | Aceto-orcein | 400× | Cells in interphase, prophase, metaphase, anaphase and telophase |
| Pond water (living) | None | 100× to 400× | Paramecium, Euglena, Volvox, Amoeba, diatoms and Spirogyra |
| Bacteria | Gram stain | 1000× with oil | Purple Gram-positive cocci and pink Gram-negative rods |
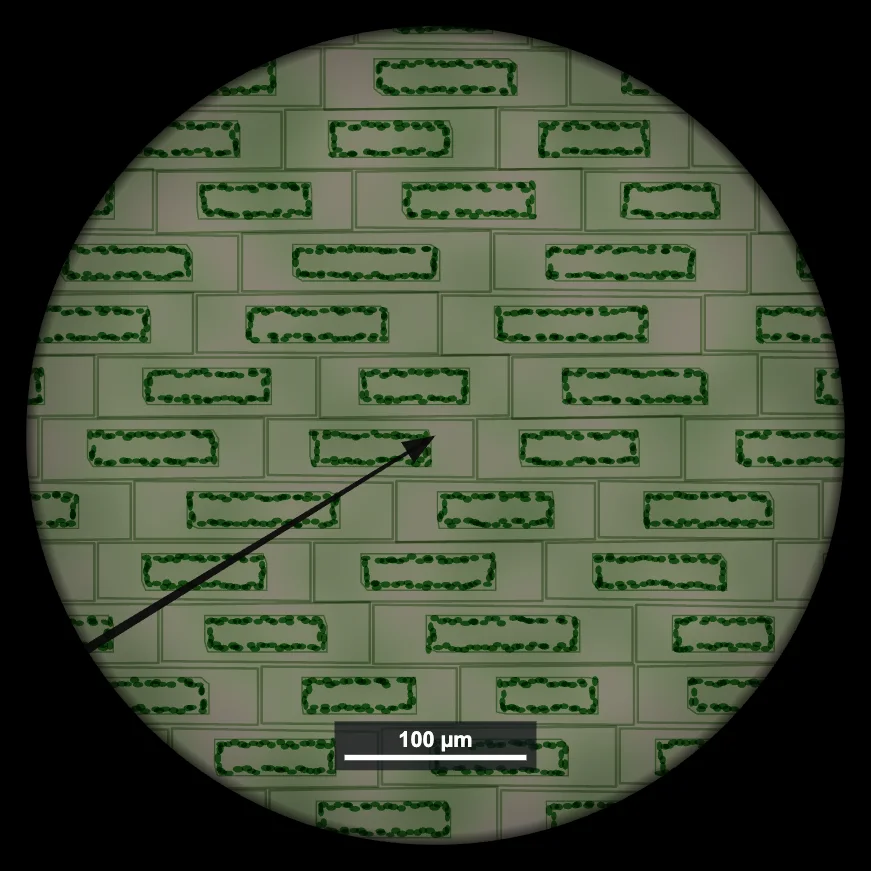
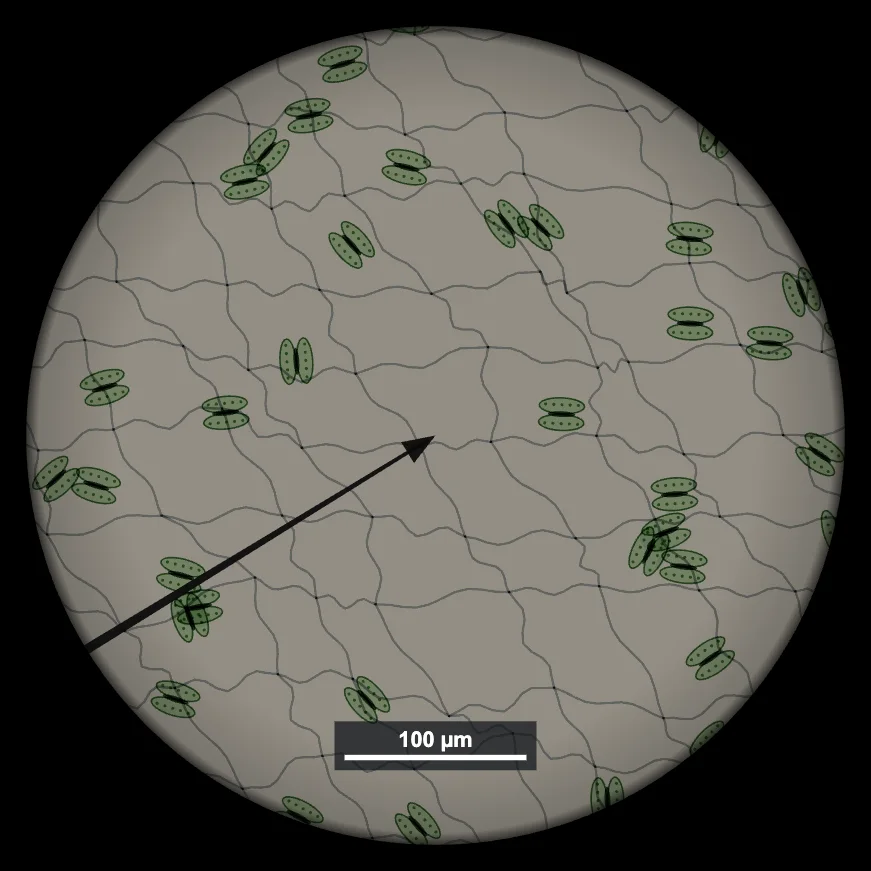
| Leaf lower epidermis | Peel | 400× | Stomata between two guard cells, about 210 per mm² |
| Stage micrometer | None | 40× to 400× | A 1 mm scale in 10 µm divisions for calibrating the graticule |
| Letter "e" and crossed threads | None | 40× to 100× | Image inversion and depth of field |
Experiments and required practicals
| Experiment | What you find out | Course links |
|---|---|---|
| Your first focus | How to focus, and why the image is inverted | All courses |
| Which thread is on top? | How depth of field changes with magnification | GCSE, IGCSE |
| A plant cell up close | Plant cell structure and cell length | AQA GCSE Biology RP1, Edexcel GCSE CP1 |
| Calibrate the eyepiece graticule | The value of one eyepiece unit at each objective | A-level Biology, IB Biology |
| The iris diaphragm trade-off | Contrast against resolution | A-level, college |
| Plasmolysis in Elodea | Osmosis in living plant cells | GCSE, AP Biology |
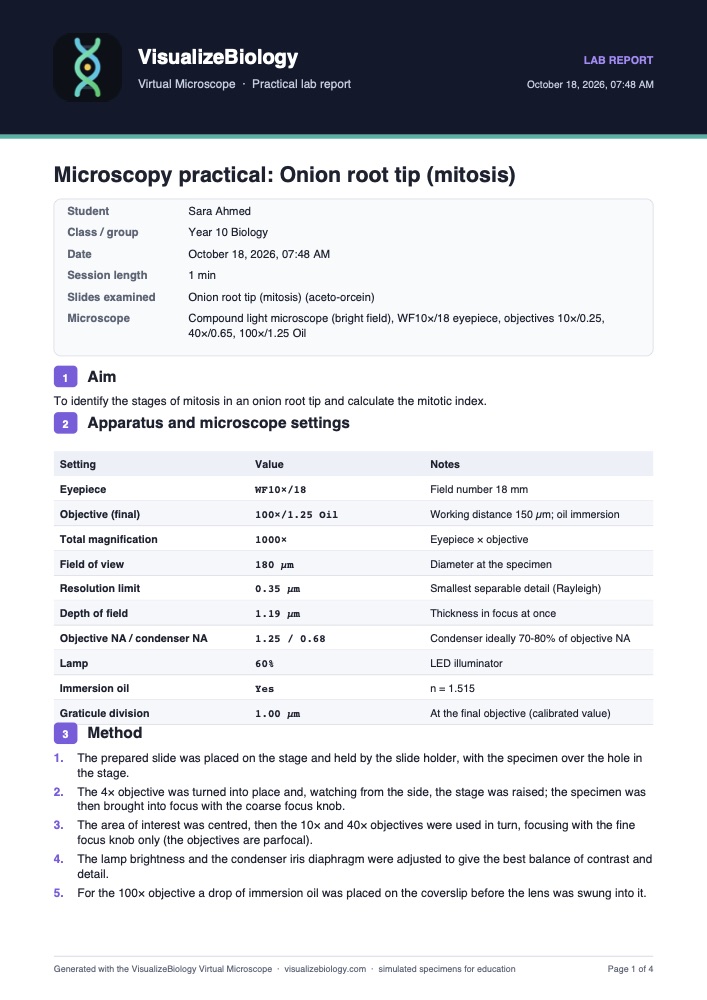
| Mitotic index of a root tip | Stages of mitosis and the mitotic index | AQA A-level RP2, AP Biology Lab 7, IB Biology |
| Why oil immersion? | How numerical aperture limits resolution | A-level, AP Biology, college |
| Blood: differential white cell count | White cell types and their proportions | GCSE, A-level |
| Stomatal density | Stomata per mm² of leaf | GCSE, A-level |
Each experiment keeps your measurements and counts in a lab notebook you can export as a CSV file. The PDF lab report lays out the aim, method, figures, results, worked calculations and sources of error, with space for your conclusion.
Who uses this virtual microscope?
Students use it to learn the parts and the focusing routine before a practical, to catch up on a missed lab, and to practise magnification and field-of-view questions with worked answers. Teachers put it on a projector to show focusing and the iris, and set the experiments as homework when there are not enough microscopes to go round. It needs no login, so it works on school Chromebooks.
Frequently asked questions
Is there a free virtual microscope online?
Yes. This one is free and needs no account or download. It simulates a school compound light microscope with four objectives and 11 slides, in 3D or 2D.
How do you calculate total magnification?
Multiply the eyepiece magnification by the objective magnification. A 10× eyepiece with a 40× objective gives 400×; with the 100× objective it gives 1000×.
Why is the image upside down in a microscope?
The objective forms an inverted image and the eyepiece magnifies it without turning it back, so the image is rotated 180°. Move the slide to the right and the image moves to the left.
What is the field of view at 400×?
With a 10× eyepiece of field number 18 mm, the field of view at 400× is 18 ÷ 40 = 0.45 mm, or 450 µm. At 100× it is 1.8 mm and at 1000× it is 0.18 mm.
What can you see in an onion cell under a microscope?
At 100× to 400× with iodine stain you can see the cell wall, the cytoplasm, the nucleus and often a nucleolus. The large vacuole fills most of the cell. Onion epidermis has no chloroplasts.
Why do you use oil with the 100× objective?
Immersion oil has the same refractive index as glass (about 1.515), so light leaving the slide at wide angles still reaches the lens. That raises the numerical aperture to 1.25 and the resolution to about 0.27 µm.
Can I use it for the GCSE microscopy required practical?
Yes, as preparation and revision. The onion cell experiment follows AQA Required Practical 1 and Edexcel Core Practical 1, including measuring cells and calculating magnification. It does not replace hands-on lab work.
Does it work on Chromebooks and phones?
Yes. It runs in any modern browser. Computers and tablets open the 3D microscope; phones open the 2D view, and you can switch any time.
Explore related simulators
Coming next to VisualizeBiology: the osmosis lab, the mitosis simulator, the enzyme activity lab and the photosynthesis rate lab. They will link from here as they launch. For engineering and physical-science simulators, see our sister site MechSimulator.
Sources: Murphy & Davidson, Fundamentals of Light Microscopy and Electronic Imaging (2nd ed., 2012); Nikon MicroscopyU, "Depth of Field and Depth of Focus"; OpenStax Biology 2e, §4.1 Studying Cells; AQA GCSE Biology (8461) Required Practical Handbook; AQA A-level Biology (7402) required practicals 2 and 4.